How to automatically send messages on Discord
Learn how to connect a Discord account, create an Autosender campaign, add target channels, set a schedule, and monitor automatic messages.
Veröffentlicht am 14. Juli 2026
Automatically sending Discord messages is useful when you need to keep an announcement, listing, or community update visible without manually reposting it every time. With Autosender, you can choose the message, target channels, repeat interval, and optional daily send windows from one campaign.
This guide walks through the standard Message campaign from start to finish. By the end, you will have a campaign that is ready to start, easy to monitor, and simple to stop when you no longer need it.
Before you begin: Only send messages in channels where you have permission to post, and choose a frequency that follows each server's rules. Autosender automates delivery; it does not override channel permissions or server rules.
What you need
Have these ready before opening the campaign editor:
- An Autosender account with access to the dashboard
- The Discord account you want the campaign to use
- The message you want to send
- At least one target channel ID
- An interval that is appropriate for those channels
The complete setup is: connect an account, create a campaign, write the message, choose the schedule, add channels, save, and start.
1. Connect your Discord account
Open the Dashboard and find Your Discord Accounts. If the account you want to use is already listed, continue to the next step. Otherwise:
- Click Add Discord Account.
- Paste the account token into Discord Tokens. If you are adding more than one, put one token on each line.
- If you need help, expand Why do we need your token? or How do I get my token? inside the dialog. The dashboard includes device-specific walkthroughs.
- Click Add Account.
- Confirm that the account appears under Your Discord Accounts before creating a campaign.
Treat a Discord token like a password. Never include it in screenshots, support messages, public documents, or the campaign's message content.
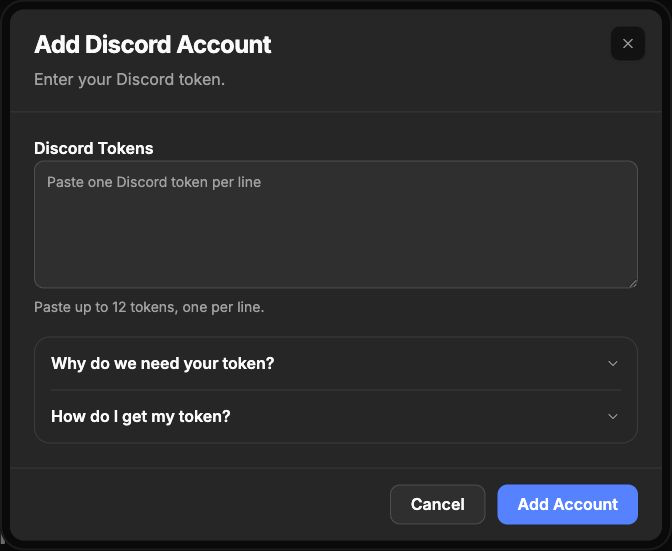
The account dialog keeps the token field and built-in setup help in one place. The screenshot contains no token.
2. Create a Message campaign
In Autosender Campaigns, click Create Campaign. Start with the fields at the top of the editor:
- Campaign Name: Use a name you will recognize later, such as the listing, server, or schedule it belongs to. This name is for your dashboard.
- Discord Account: Select the connected account that should send the message.
- Delivery Mode: Choose Message for a normal text campaign.
- Message Content: Write the message exactly as you want it to appear on Discord.
Message campaigns support two content modes:
- Rotation is the straightforward choice for recurring posts. Add more messages with the plus button when you want the campaign to rotate through different versions.
- Sequence is useful when messages must be sent in a particular order. It adds a wait setting between steps.
For a first campaign, use Rotation with one clear message. You can add variants after the basic campaign is working.
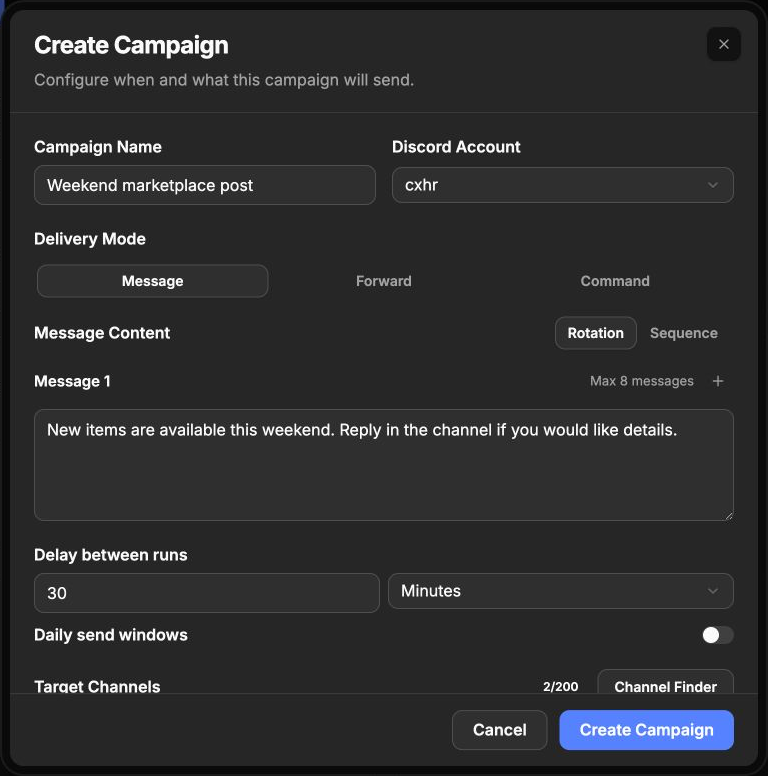
This example uses Message delivery, one message, and a descriptive internal campaign name.
3. Set the repeat interval and daily send windows
Under Delay between runs, enter a number and choose Seconds, Minutes, Hours, or Days. This is the interval Autosender uses between campaign runs.
Choose an interval deliberately. A shorter delay means the same channels receive messages more often. Check the rules for every target channel and leave enough time between posts to avoid cluttering the conversation.
Use Daily send windows when the campaign should only run during certain hours. Turn the switch on, choose the start and end time, and review the local timezone shown in the editor. Leave the switch off when you do not need a daily time restriction.
4. Add the target channels
The Target Channels field tells Autosender where to send the campaign:
- Paste one channel ID per line.
- Watch the counter beside Target Channels to make sure you stay within the campaign's channel limit.
- If Channel Finder is available on your plan, you can use it to find and import channels instead of pasting every ID manually.
- If you do not know where to find a channel ID, expand How do I get channel IDs? for the walkthrough built into the editor.
Before saving, verify that each ID belongs to the intended channel and that the selected Discord account can view and send messages there.
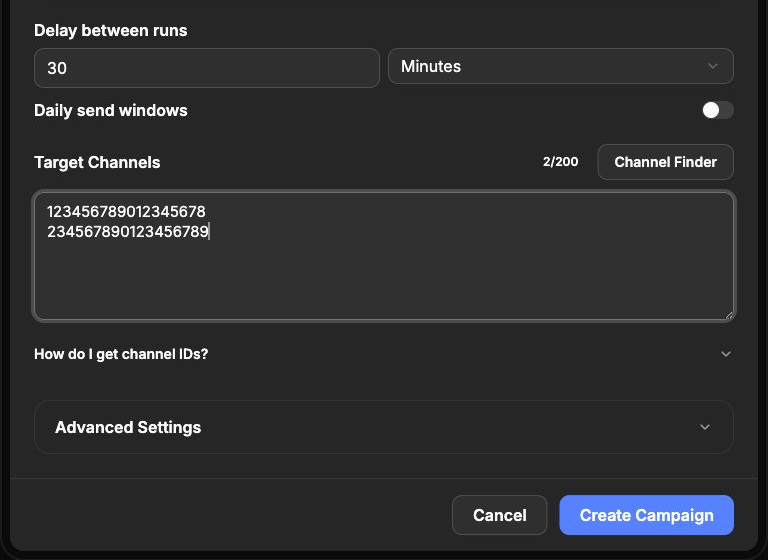
The IDs above are examples, not real target channels. Use the IDs from the channels where your account is allowed to post.
5. Review and create the campaign
Before clicking Create Campaign, do one final review:
- The correct Discord account is selected.
- The message has no unfinished placeholders, broken links, or accidental mentions.
- The delay and time unit match the frequency you intended.
- Daily send windows are either configured correctly or turned off.
- Every target channel ID is on its own line.
- The channel counter is within your plan limit.
Click Create Campaign when everything looks right. The new campaign will appear as a card in Autosender Campaigns.
6. Start and monitor automatic messages
A saved campaign does not need to be difficult to manage. Its dashboard card shows the account, interval, current status, sent count, failed count, and timing information.
- Find the campaign card and click Start Campaign.
- Confirm that its status changes to Running.
- Watch Messages Sent, Failed, and Next Send In while the campaign runs.
- If Autosender reports invalidated channels, open Manage Invalidated Channels and review them.
- Click Stop Campaign whenever you want to pause delivery.
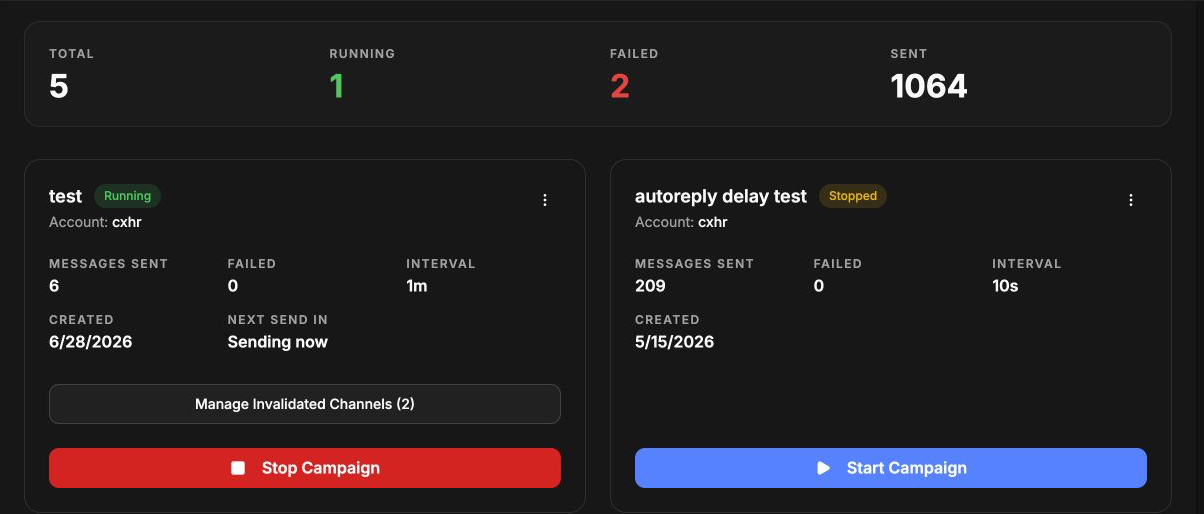
Running and stopped campaigns use the same dashboard, so you can see delivery health and control the campaign without leaving the page.
A good first-campaign setup
Keep the first run intentionally simple:
- Use one connected Discord account.
- Start with one short message in Rotation mode.
- Target a small set of channels you can check yourself.
- Use a conservative interval that matches the channels' rules.
- Add a daily send window if posts should stop overnight.
- Confirm the first delivery in Discord before expanding the campaign.
Once that version is working, add more channels or message variants one change at a time. This makes it much easier to identify which setting caused a problem.
Troubleshooting
Start Campaign is disabled
Read the message shown on the campaign card. Common causes are a missing linked account, no configured channels, or an account that needs to be reconnected. Fix the specific item, then try again.
Messages are failing
Check that the account is still connected, the channel IDs are correct, and the account can send messages in each channel. If Manage Invalidated Channels appears, review that list first.
Messages are sending at the wrong frequency
Open the campaign settings and check both parts of Delay between runs: the number and the selected unit. Also check whether Daily send windows are enabled and whether their displayed timezone is the one you expected.
The account does not appear in the campaign editor
Return to Your Discord Accounts and confirm the account card is present. If it is missing, use Add Discord Account again and follow the help inside that dialog.
The campaign reached a limit
The editor shows the current message and channel limits directly in the form. Reduce the number of entries or use a plan with the capacity your campaign needs.
Final checklist
Before sharing or relying on the campaign, confirm all seven items:
- The intended Discord account is connected and selected.
- The message is final and has been proofread.
- Rotation or Sequence matches the behavior you want.
- The repeat interval is appropriate for every target channel.
- Daily send windows and timezone are correct.
- Channel IDs are correct and within the displayed limit.
- You know where to check failures and stop the campaign.
That is the complete setup. Open the dashboard, start with a small campaign, verify the first delivery, and then expand only when the results look right.